Steam curls up from the valve and your stomach starts talking back. It’s like the air’s getting thick with sweetness making you wanna hurry but you gotta hold up a bit. The pressure cooker’s doing its thing, locking flavor in while the cheesecake gets that perfect softness you just can’t get with any old pot.

You notice the float valve’s standing proud, letting you know it’s sealing tight. You watch steam cues as they puff out gentle and steady, a quiet reminder that something good’s cooking inside. Your kitchen smells off the charts already and you remember how much easier this is than battling with the oven for hours.
It’s soft, it’s light, like biting a cloud with a tiny lemony zing in the background. You feel that anticipation building cause, dang, making cotton cheesecake with a pressure cooker is kinda next level. You don't want it dense or heavy but nice and fluffed up like it’s barely there, and this method is gonna get you just that.
Why Your Cooker Beats Every Other Pot
- Locks in moisture perfectly so your cheesecake stays soft.
- Pressure cooks faster than a traditional oven bake, saving you time.
- Float valve lets you know when pressure is right, so no guesswork.
- Steam cues help you track your cooking progress without opening it.
- Natural release method keeps the cheesecake from cracking.
- Creating a water bath inside your cooker is easier and less messy.
- You don’t have to preheat a huge oven, which is awesome in small kitchens.
All the Pieces for This Meal
- 5 large eggs at room temp, to help your batter rise real nice.
- ¼ teaspoon cream of tartar—this little trick keeps your egg whites stable.
- ½ cup sugar divided, so you sweeten the whites just right.
- 8 oz cream cheese softened so it blends smooth.
- ½ cup low-fat milk for that tender, light texture.
- ¼ cup unsalted butter softened, helps richness without heaviness.
- 1 tablespoon lemon juice adds a mild zing to balance sweetness.
- ¼ cup all-purpose flour to give it enough structure.
- 2 tablespoon corn starch for that signature fluffy, airy feel.
- 8 inch round springform pan wrapped with foil so no water sneaks in.

Walking Through Every Single Move
Preheat your pressure cooker setup by lining a pan with parchment and wrapping the springform with foil.
Separate eggs carefully so no yolk sneaks into whites—that’d mess your fluff.
Melt cream cheese, butter, and milk in a saucepan on low heat, stirring till smooth; cool a bit to avoid cooking eggs too soon.
Whisk the cream cheese mix with egg yolks, lemon juice, flour, and corn starch till all smooth with no lumps.
Beat egg whites with cream of tartar till foamy. Slowly add half your sugar and whip till stiff peaks form. You want those whites nice and proud.
Fold one-third of those whites gently into your creamy mix, then fold in the rest carefully so you don’t deflate your batter.
Pour batter in the prepared pan, tap it so bubbles escape, then place pan in a larger dish filled with an inch of hot water.
Set in the pressure cooker on low heat, seal the lid letting float valve pop up. Cook for about 30-35 minutes with natural release. No quick release here or your cake might fall flat.
After cooking, open lid carefully. Let cheesecake cool inside pan, then remove after fully cooled for clean edges.
Time Savers That Actually Work
You can get your egg whites whipped while your cream cheese mix melts—that way you’re multitasking and saving minutes.
Use room temp eggs so they beat up faster, making those stiff peaks happen quicker.
Wrapping your pan with foil in advance stops water from leaking, so you skip cleaning extra mess later.
The Flavor Experience Waiting for You
When you finally get a slice, it’s kinda like biting into something super soft but still with a little bounce. That cream cheese flavor is gentle and not overpowering, just enough to remind your taste buds how much they like it.
The lemon juice sneaks in just so, giving it a tiny bright hit that cuts down the sweet and keeps it feeling fresh. It’s like a little hint that makes you want another slice, no joke.
The texture’s what really gets ya. Fluffy but creamy, almost like it’s melting as soon as you put it in your mouth. It’s dang satisfying and different from your usual dense cheesecake.

How to Store This for Later
After cooling fully, keep your cheesecake in the fridge wrapped tight with plastic wrap or in an airtight container to avoid drying out.
You can also freeze it if you wanna save some for days when you need a quick treat. Just slice it first and wrap each piece in foil before storing in freezer bags.
When ready to eat after frozen, let it thaw overnight in the fridge and it’ll be right back to its soft, fluffy self.
Common Questions and Real Answers
- Q: Can I use a regular oven instead of a pressure cooker?
A: Yep you can, but it won’t be as quick or fluffy. Oven baking takes longer and the texture changes a bit. - Q: What’s with the cream of tartar?
A: It helps keep your egg whites stable so you get that perfect fluffiness. - Q: Can I swap regular milk with any other kind?
A: Sure, low-fat works best but you could try almond or oat milk if you want different flavor or dairy-free. - Q: What’s the difference between quick release and natural release here?
A: You want natural release so the cheesecake cools slowly and doesn’t crack. Quick release could make it fall. - Q: Why wrap the pan with foil?
A: Keeps water out during the water bath so your cake stays dry and cooks evenly. - Q: My cake cracked, what went wrong?
A: Could be too much pressure or quick release too soon. Let it do a natural release and cook with gentle steam cues.
Looking to try other easy and delicious recipes? Check out our Apple Galette Vegan Gluten Free for a quick dessert option with advanced freezer-friendly tricks. Or dive into our savory Easy Thai Baked Chicken Meatballs made effortlessly in your skillet and oven. Explore more unique recipes like Cheesy Taco Sticks that bring fun flavors to any gathering.
For meal planning and easy prep ideas, our Ultimate Quinoa Instant Pot Cooking Guide offers quick steps for making this superfood a staple in your diet. And if you want to snack right, try Mozzarella Stuffed Rosemary Parmesan Soft Pretzels that blend gooey cheese with aromatic herbs. Finally, the Delicious Tortilla Burger Recipes add a fun Tex-Mex twist to classic burgers, perfect for casual meals or parties.
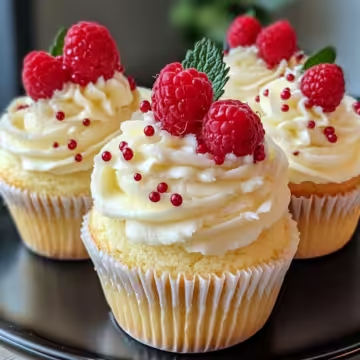
Cotton Cheesecake / Japanese Cheesecake
Equipment
- 1 Mixing bowl for egg whites and batter
- 1 Saucepan for melting cream cheese, milk, butter
- 1 8 inch springform pan wrapped in foil
Ingredients
Main ingredients
- 5 large eggs at room temperature
- ¼ teaspoon cream of tartar
- ½ cup sugar divided
- 8 oz cream cheese at room temperature
- ½ cup low-fat milk
- ¼ cup unsalted butter at room temperature
- 1 tablespoon lemon juice
- ¼ cup all-purpose flour
- 2 tablespoon corn starch
- 1 8 inch round springform pan wrapped with foil
Instructions
Instructions
- Line the bottom and side of springform pan with parchment paper and wrap with foil.
- Separate eggs; make sure no yolk gets into whites.
- In saucepan, melt cream cheese, butter, and milk over low heat, stir till smooth. Let cool slightly.
- Whisk cooled cheese mixture with yolks, lemon juice, flour, and corn starch until smooth.
- Beat egg whites with cream of tartar until foamy. Gradually add half of sugar and beat until stiff peaks form.
- Fold ⅓ of whites into cheese mix gently, then fold in remaining whites without deflating batter.
- Pour into prepped pan, tap to remove bubbles. Place pan into larger dish with 1 inch hot water.
- Cook in pressure cooker on low heat for 30–35 minutes with natural release.
- Open lid carefully, let cool in pan, then remove once cool for clean edge.
- Chill for at least 4 hours before serving. Store wrapped in fridge or slice and freeze for later.