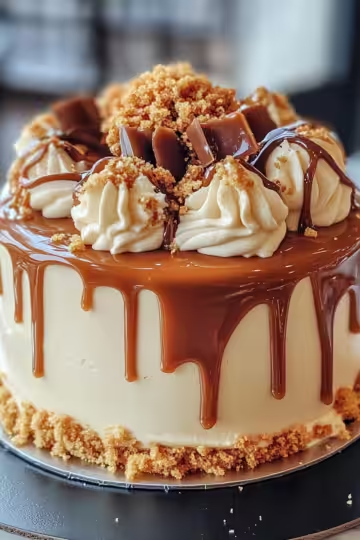
The pressure builds and you start counting down minutes until you eat. You notice the sealing ring snug and ready for the job. That little float valve does its job like a champ showing when you gotta wait and when you can release the pressure naturally.

It’s kinda funny how the timer feels like it’s taunting you as it ticks down. You catch yourself daydreaming about that creamy Biscoff cheesecake filling mixing with crumbly cookie crust. Patience really is the hardest part here.
But when the valve finally hisses and you do the tender pull of the lid, there’s this satisfying little release of steam and anticipation. You know the sweet reward’s just a slice away.
The Truth About Fast Tender Results
- Pressure cooking cuts down baking times without drying the cheesecake out.
- The natural release is key for that silky smooth filling—rushing it can mess up the texture.
- Using a sealing ring that’s in good shape helps keep your pressure steady and even.
- The float valve lets you know when it’s safe so you can avoid a messy steam escape.
- You get that tender pull moment that's like opening a treasure chest of flavors.
- Cookies crush faster and mix evenly with butter when you pulse in a food processor first.
What Goes Into the Pot Today
- 250 grams biscoff cookies for the crust
- ⅓ cup unsalted butter melted to bind crumbs
- 907 grams cream cheese softened for that creamy base
- 1 cup brown sugar for deep sweetness
- ¼ cup granulated sugar to balance flavors
- ½ cup sour cream gives that tang and moisture
- 1 cup biscoff cookie butter mixed right in
- 1 tablespoon vanilla extract for some warmth
- ¼ teaspoon salt to lift all the tastes
- 4 large eggs room temp to hold it all together
The Full Pressure Cooker Journey
First off, you gotta crush those biscoff cookies real fine. The easiest way? Put em in a zip bag and pound, or if you’re fancy, a quick whiz in the food processor works, too.

Mix those crumbs with melted butter till they’re nicely coated and press that mix into the bottom of your 9-inch springform pan lined with parchment paper. Set it aside, you’re gonna need a clean bowl next.
Beat your softened cream cheese till it’s smooth and fluffy. Add both sugars and keep whipping till it’s well combined. This is where it starts smelling like heaven.
Now stir in sour cream, your biscoff cookie butter, vanilla extract, and salt. The texture turns creamy and smooth, perfect for filling your crust.
Add eggs one by one—low speed mixing only, you wanna keep it light and avoid extra air bubbles. Pour this batter gently over your crust and smooth the top with a spatula.
Set your pan on the trivet inside the Instant Pot filled with about a cup of water. Seal the lid, check your sealing ring, and make sure the float valve is set to sealing. Cook on high pressure for 35 minutes. Then, do a natural release for 20 to 25 minutes—don’t rush! Once done, gently remove the pan, let it cool a bit, then chill in fridge before digging in.
Time Savers That Actually Work
Always soften your cream cheese and eggs ahead to skip mixing headaches.
Crush biscuits quickly in a food processor instead of the manual pounding method. It works real good and way faster.
You can prep your crust and filling the night before, then just cook and chill the next day. Saves you a ton of fuss in one go.
Your First Taste After the Wait
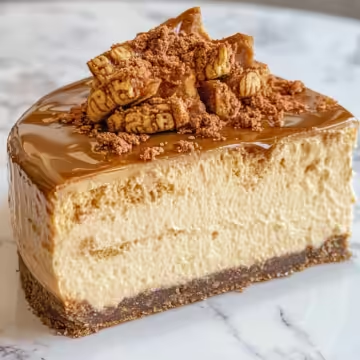
When you slice into that cheesecake, you notice the crust is crisp yet tender, holding all the cookie butter goodness without being soggy.

The filling is silky smooth and rich, with biscoff’s caramel hints dancing through every bite. It’s sweet but balanced with sour cream’s slight tang.
You catch that creamy texture melting away slowly as you savor a spoonful, and it kinda feels like a warm hug after a long day.
Every taste leaves you wanting another slice, and you get why waiting's worth it every single time.
Smart Storage That Actually Works
- Wrap leftover cheesecake tightly in plastic wrap to keep moisture in and odors out.
- Store in an airtight container in the fridge where it should last about 4 to 5 days.
- You can freeze individual slices wrapped well in foil and plastic to protect from freezer burn for up to a month.
- Thaw frozen cheesecake slices overnight in the fridge and serve chilled for best texture.
The FAQ Section You Actually Need
- Can I use all-purpose flour in this recipe? This cheesecake’s crust is all cookie based, so flour isn’t necessary here. For macarons or cookies, yeah, flour plays a big part but not for this one. Learn more about easy cookie recipes to expand your baking skills.
- What’s natural release and why does it matter? Natural release means letting the pressure drop on its own without pushing the valve manually. It lets cheesecake set slowly so it won’t crack or get rubbery. For other pressure cooker techniques, check out tips on natural release for tender meatballs.
- Can I substitute biscoff cookie butter with regular peanut butter? You could but it’ll change flavor and texture way more than you might want. Biscoff cookie butter gives the signature caramel spice taste.
- Why do I need a sealing ring and float valve? The sealing ring helps keep your pot airtight. The float valve shows when pressure’s up or down. Both keep cooking safe and results consistent. See our guide on pressure cooker essentials for perfect equipment care.
- Can I use the pressure cooker to make other desserts from your list? Definitely! Things like instant pot dulce de leche or strawberry cream cheese muffins work great in there.
- Why does natural release take so long? It’s slow for a reason so steam gently escapes and your cheesecake sets tender instead of shrinking or cracking.
Biscoff Cheesecake Pressure Cooker Adventure
Equipment
- 1 Mixing bowl Large
- 1 Food processor For crushing cookies
- 1 Springform pan 9-inch lined with parchment
- 1 Instant Pot For pressure cooking
- 1 Spatula To level the batter
Ingredients
Main ingredients
- 250 grams biscoff cookies for the crust
- ⅓ cup unsalted butter melted to bind crumbs
- 907 grams cream cheese softened
- 1 cup brown sugar for deep sweetness
- ¼ cup granulated sugar to balance flavors
- ½ cup sour cream gives that tang and moisture
- 1 cup biscoff cookie butter mixed right in
- 1 tablespoon vanilla extract for some warmth
- ¼ teaspoon salt to lift all the tastes
- 4 large eggs room temp to hold it all together
Instructions
Instructions
- Crush biscoff cookies until fine in a zip bag or food processor.
- Mix crushed cookies with melted butter and press into a 9-inch springform pan lined with parchment paper. Set aside.
- In a clean bowl, beat cream cheese until smooth and fluffy. Add brown and granulated sugar; beat until well combined.
- Stir in sour cream, biscoff cookie butter, vanilla extract, and salt. Mix until creamy.
- Add eggs one at a time using low speed. Mix gently to avoid incorporating too much air.
- Pour batter over crust in the pan and smooth the top.
- Place pan on trivet inside Instant Pot with 1 cup of water. Seal lid and ensure float valve is set.
- Cook on high pressure for 35 minutes. Let pressure release naturally for 20–25 minutes.
- Remove pan carefully, allow to cool slightly, then chill in fridge before serving.